

How to Transfer Photos from Android to PC
"How do I transfer photos from an Android device to a PC?"
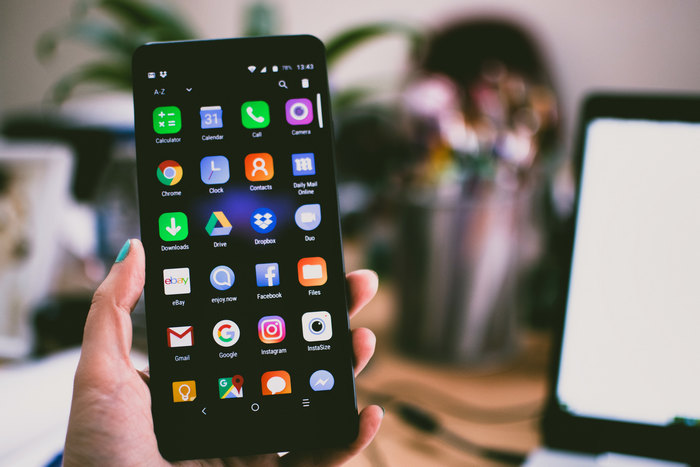
Nowadays, people can use Android phones to take fantastic photos. Some even have the 108MP camera. It’s not safe to put all the photos on your Android phone including some important ones. In case of losing data, transferring photos from your Android phone to your PC to make a backup is necessary. There are several easy ways to do it. And this article will introduce these easy methods to you in detail.
- Way 1: Transfer Photos from Android to PC via USB Cable
- Way 2: Transfer Photos from Android to PC with One Click
- Video Tutorial - Transfer Photos from Android to PC with One Click
- Way 3: Selectively Transfer Photos from Android to PC
- Way 4: Transfer Photos from Android to PC with Google Drive
- Way 5: Transfer Photos from Android to PC with Microsoft Photos App
Way 1: Transfer Photos from Android to PC via USB Cable
Using a USB cable to connect your Android phone with your PC is the most convenient method to transfer photos. The only tool needed is a USB cable.
Steps to transfer photos from Android to PC via USB cable:
Step 1 Unlock your Android phone and connect your Android phone to your PC using the cable that came with your phone for charging. Make sure that your PC has accessed to the phone.
Step 2 There will be a pop-up message on your Android phone to let you choose the USB options once you have connected them successfully. You need to choose the “File Transfer” option.
Step 3 Go to “This PC” on your computer and you will find your device in File Explorer. Then double click to open your device > Internal (shared) storage > DCIM > Camera. All the photos you took with your Android device will be displayed in the “Camera” folder. Other photos which are not taken by the phone camera will be shown in the “Download”, “ Pictures” folder. The images you downloaded from some apps normally will be stored in the folder named related to the app’s name or exactly the app’s name. Anyway, you need to find these photos from other folders except “Camera” if you want to transfer them.
Step 4 Find the photos you want to transfer and drag them to a local computer folder to copy them. Make sure that all photos have been copied to the folder before unplugging your phone.
Way 2: Transfer Photos from Android to PC with One Click
You may have noticed that although way 1 is convenient but not that efficient if you want to transfer all photos on your Android phone. To transfer photos more efficiently and faster, a good phone data transfer tool is needed, for example, Syncios Data Transfer. It is a handy Android tool that enables you to back up and restore the photos from your Android phone to your computer with just one simple tap on your mouse. And if you change your old phone to the new one, it can help you to transfer all data from your old phone to the new one directly with one click, too.
What Syncios Data Transfer can do:
- Transfer almost all files, including contacts, video, SMS, photos, call logs, music, calendar, and more between phone to the computer!
- Back up and restore Android data with one click.
- Supports almost all Android phones and tablets.
- Transfer across multiple platforms: iOS to iOS, Android to Android, iOS to Android, Android to iOS.
- Easy to use, powerful function and 100% safe for your data.


Steps to transfer photos from Android to PC with one click:
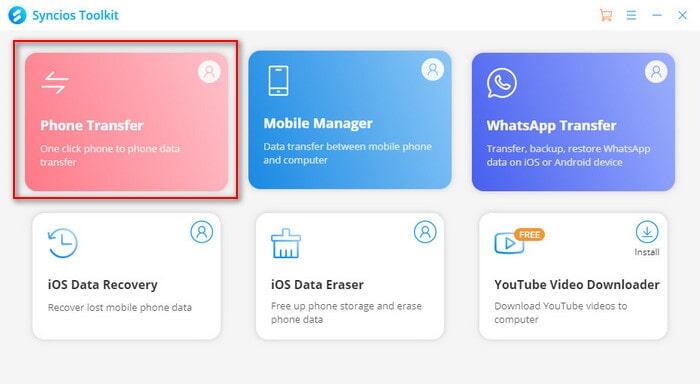
Step 1Get the tool on your computer by clicking the above button. Then click on “Phone Transfer” from the Syncios Toolkit to launch Syncios Data Transfer.
Step 2Connect your Android phone to the PC via a USB cable.
Unlock your Android phone and connect it with your computer via a USB cable. Please note that Android phones need to enable USB Debugging mode to get it detected by Syncios. Please follow this guide to do it.
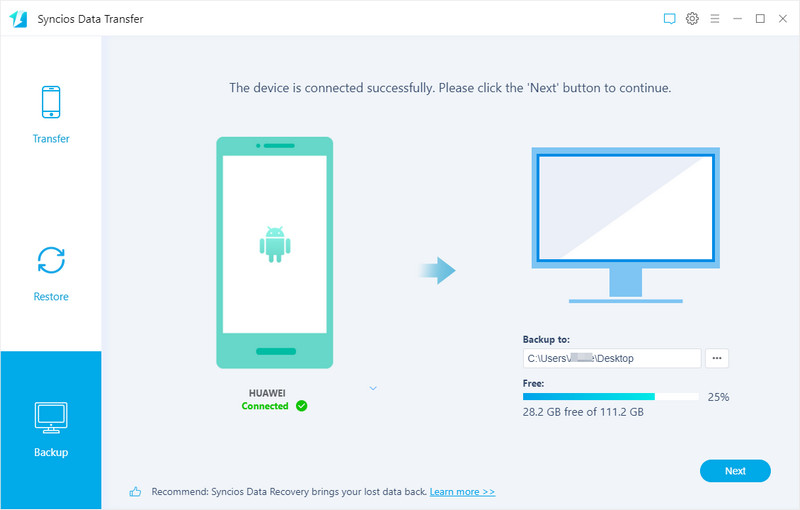
Step 3 Choose the “Backup” mode.
After you get into the main interface of the program and get your phone connected, you will see three modes in the left panel. To back up the photos from your Android phone to the computer we should choose the “Backup” mode. Then click on the "Next" button to continue.
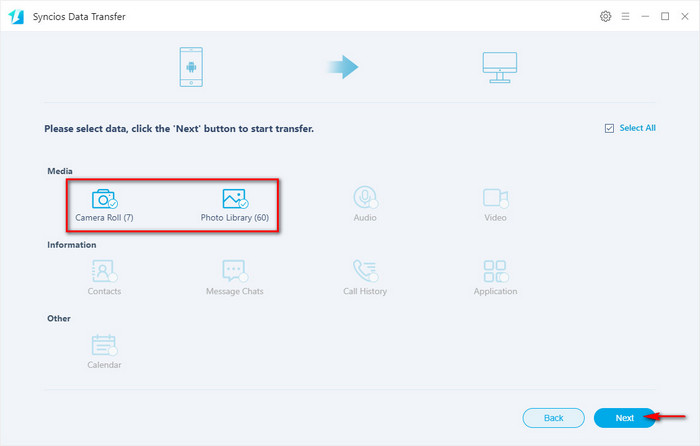
Step 4Begin processing.
Then you will see different data types you can transfer in this window. Check "Camera Roll" and "Photo Library" and then click on the "Next" button to load the data. When it finishes loading, click on the "Next" again to begin transferring photos to your computer.
Please keep your Android phone connected with the computer while processing. After it’s done, you will see the window showing the finish of transferring, and the target folder will also pop up so you can check the transferred photos.
Video Tutorial - Transfer Photos from Android to PC with One Click
Way 3: Selectively Transfer Photos from Android to PC
If you want to select specific or certain photos to transfer, Syncios Mobile Manager is the better tool for you. As a multifunctional phone manager tool, it supports previewing and choosing all photos on your Android phone before transferring.
Key features of Syncios Mobile Manager:
- Selectively Backup and Restore Contacts, Message, Call log, Music, Video, Photo, Apps and etc.
- Preview and export photos from mobile phone to computer.
- Supports almost all Android phones and tablets.
- Help to organize every iOS devices/Android's file.
- Handy tools: One-Click Backup/Restore, Photo Compression, Ringtone Maker, Audio Converter and Video Converter.

Steps to selectively transfer photos from Android to PC:
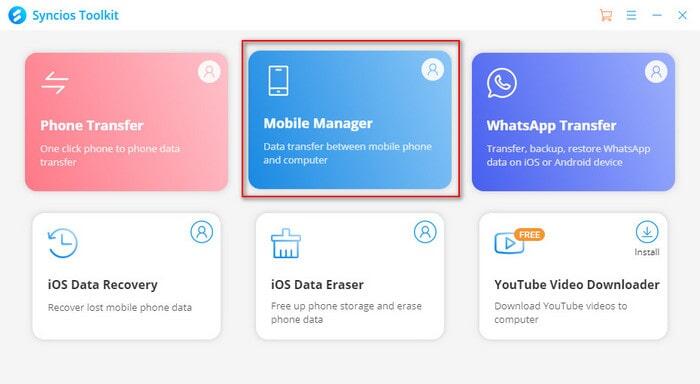
Step 1 Download and install Syncios Mobile Manager from the above download button, and then launch Syncios Toolkit and click on “Mobile Manager” on the main interface to run it.
Step 2 Connect your Android phone to the PC via a USB cable.
You should enable the USB debugging mode on the OnePlus phone so the Syncios can detect and connect with the phone. Click here to get help if you met some problem during the connection.
Step 3Once get into the interface, you’ll see several different contents in the upper menu. Click on “Photo” and all photo albums on your Android phone will be displayed on the main window.
![]()
Step 4 Select the photos and start transferring.
You can double-click an album to preview certain photos and transfer or single-click to choose the whole album to transfer. After selection, you can click on “Export” and it will pop out a window to let you choose a folder as the destination. Just select a folder and it will start transferring. Wait patiently and don’t operate your phone during the process.
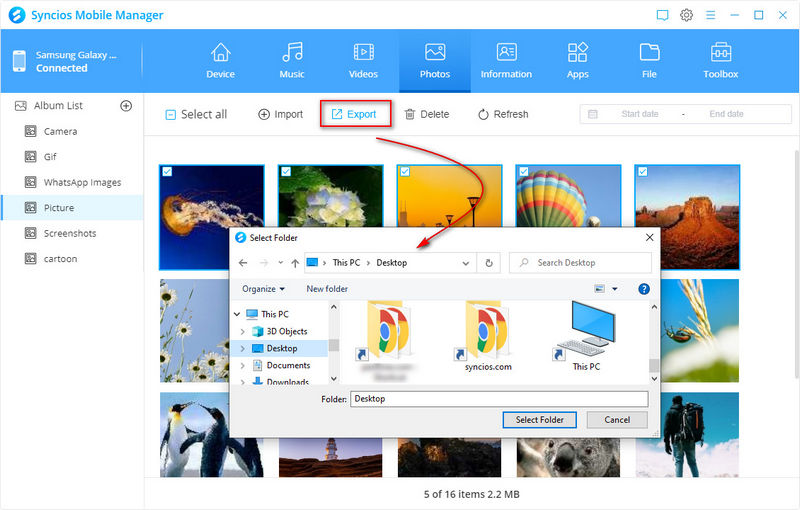
When the process is completed, the destination folder’s window will also pop up, and you can check if you neglect one or not.
Way 4: Transfer Photos from Android to PC with Google Drive
Using Google Drive to transfer photos between the Android device and the computer is also an easy method. If you have a Google account then you will only need to download an app on your Android phone to accomplish the transfer.
Steps to transfer photos from Android to PC with Google Drive:
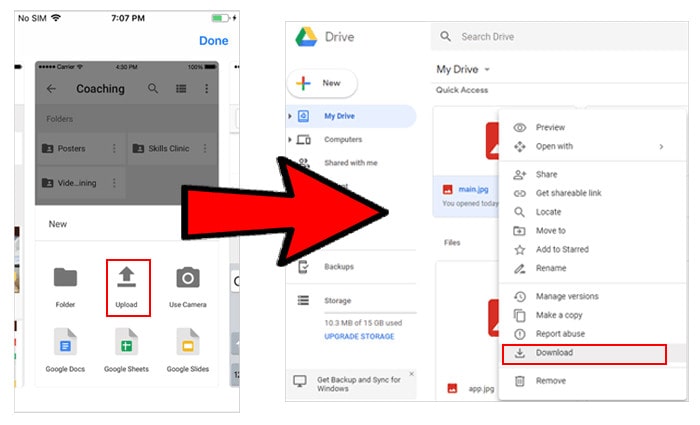
Step 1 Download and install the Google Drive app from the Google Play Store if you didn’t have it on your Android phone. Then open it and log in to it with your Google account.
Step 2 After logging in your Google account, click the "+" icon and choose “Upload” to upload the photos you want to transfer.
Step 3 Now open your computer and go to drive.google.com, then sign in with the same Google account which you just logged in to your Android phone.
Step 4The files you upload will be displayed on the main interface. You can preview and choose the photos, then right-click them and choose “Download” to save them to your computer.
Note: The storage is limited to 15 GB for a free Google account, make sure that your files’ size won’t exceed it.
Way 5: Transfer Photos from Android to PC with Microsoft Photos App
Windows users often use Microsoft Photos App to view photos on the PC. And you can also use Microsoft Photos App to transfer photos from Android device to PC if you want to download any other third-party software.
Steps to transfer photos from Android to PC with Microsoft Photos App:
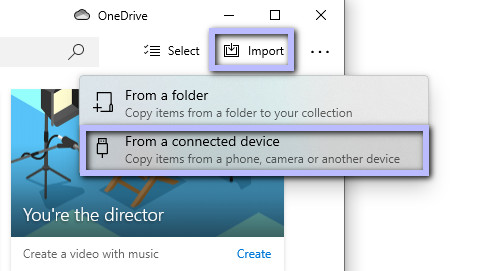
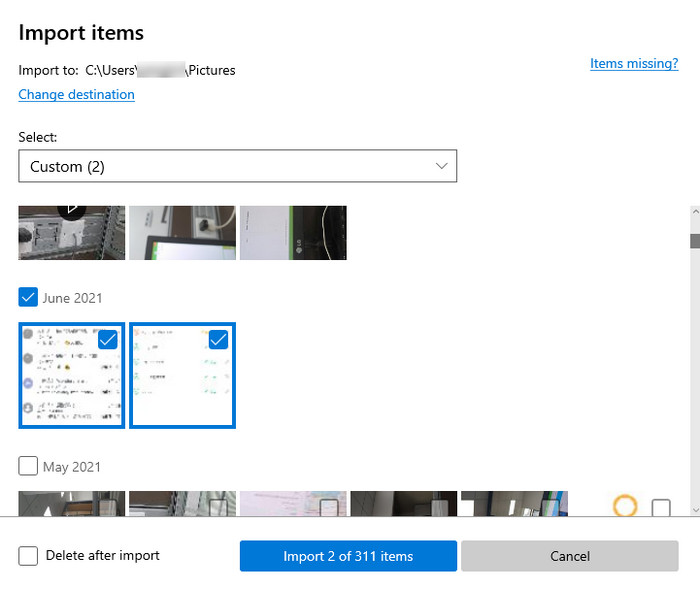
Step 1 Connect your Android phone to your PC with a USB cable. Click “Type here to search” in the lower-left corner of the computer’s desktop, and click Apps > Photos in the next window. Then Photos will be launched. You can also search “Photos” directly to find and launch the app.
Step 2 Get into the main interface of the app and click Import > From a connected device. Then it will scan the photos on your phone and display them.
Step 3 Choose the photos you want to transfer and click on the “Import - of - items” button to begin the process.
Conclusion
Here we share with you 5 easy methods to transfer photos from an Android phone to a PC. Using Syncios Mobile Manager to
Tips: What's next? Download Syncios Mobile Manager now!

Syncios Location Changer
One-click to spoof iPhone location and simulate GPS movement. Learn more >>

Syncios Passcode Unlocker
Remove iPhone passcode, Face ID, Apple ID, Screen Time passcode. Learn more >>
Syncios D-Savior
Recover all types of data from HDDs, USB drives, SD cards, SSDs, etc. Learn more >>
Related Channels
Unlock Phones
- Turn Off Screen Time on iPhone/Mac
- Turn Off Screen Lock on iPhone in Seconds
- Unlock iPhone without Passcode Instantly
- Change Screen Time Passcode Without Code
- Unlock iPhone without Apple ID
- How to Unlock Disabled iPhone
- How to Remove Screen Lock on iPhone
- [Solved] Forgot Screen Time Passcode
- 14 Ways to Solve Face ID Not Working
Data Recovery
- SD Card Recovery: Recover Data from SD Card
- How to Remove Recycle Bin from Desktop
- Recover Deleted/Unsaved/Overwritten Excel
- Windows 10/11 Startup Folder
- How to Format SD Card to FAT32
- Recover Deleted Files from USB Flash Drive
- Stop Windows from Upgrading to Windows 11
- 10 Best Data Recovery Software for Windows
- 9 Methods to Recover Deleted Chrome History
- How to Recover Deleted Photos