![]() One management tool for all smartphones to transfer files between PC & iOS/Android devices.
One management tool for all smartphones to transfer files between PC & iOS/Android devices.
How to Erase Music from Your iPhone/iPod/iPad
With the high-end technology and the development of iOS technology, iPhone is more than a tool only for basic communication. It also provides multiple media enjoyments, such like enjoying wonderful songs, taking photos, recording memorable videos, playing smooth movies... So if your iPhone space is full, it becomes a common question that how to delete music or songs from iPhone, the same as on iPod/iPad.
Since the phone internal space is limited, you may need to free up the iPhone space for better phone performance. Then, how to remove songs from iPhone? How to avoid the deleted music coming back to iPhone? You can try following ways.
 Part 1. Directly Delete iPhone Music from iPhone
Step 1 : Delete iPhone music on phone App.
Tap Music icon to find the song which you want to delete, click "apple music" on the right side of this screen. Tap Delete to remove the unwanted songs one by one.
Step 2 : Delete iPhone songs in settings.
Go to Settings -> General -> Usage -> Manage Storage. Tap Music and find all your songs under music. Tap Edit on the right top corner to delete music one by one, or choose "All Songs" to delete all songs on your iPhone with one tap.
Cons
The deleted music may not really removed from your iOS device. It is marked deleted tag. And by using recovery tool, other people accessed your phone can get those music back on your iPhone/iPod/iPad.
Part 2. Delete iPhone Music from Computer with Free iPhone Manager
Step 1 : Download and Install Free iPhone Manager on Computer
This handy mobile manager tool has both Windows and Mac version, pick the suitable one and download the program on your computer.
Download
Win Version Download
Mac Version
Step 2 : Connect Your iPhone/iPad/iPod to Computer
Connect your iPhone/iPad/iPod device to computer and launch Syncios iPhone Manager. If this is the first you use Syncios program, then it will take a while for Syncios to download iOS related services for you. And keep your device unlocked, click "Trust this computer" on your device screen.
After your iPhone device is successfully detected by Syncios, you will see the backup list on the left panel which includes: Media(Music + Video), Photos, Ebook, Apps and Information.
![]() Syncios can not recognize your iPhone device? Please follow this tutorial.
Syncios can not recognize your iPhone device? Please follow this tutorial.

Step 3 : Delete iPhone/iPad/iPod Music Songs on Computer
Click "Media" button, all the audio information on your iPhone 8 will be displayed on Syncios. You can see Audio, Video and Playlist on the right panel. There are 6 options under "Audio": Music, Ringtones, Podcasts, Audiobooks, Voice Memos and iTunes U.
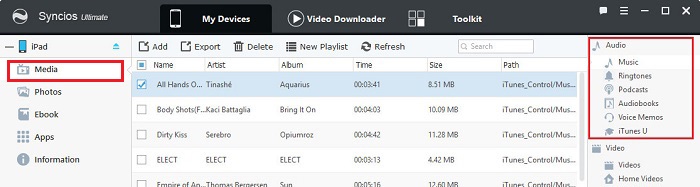
Choose "Music", you will see all your songs in Syncios. Choose the songs you want to delete and click "Delete" button, click "Refresh" button to check current media fils.
This iPhone Music manager also enables you to backup your songs to computer or transfer music from computer to iPhone/iPad/iPod for totally free.
Part 3. Permanently Erase Phone Music vis Syncios iOS Eraser
This method really remove the songs if you want to erase your music thoroughly and permanently. That is to use the third-party software to help to do it.
Here we recommend you a very useful tool for you to easily erase songs from your iPhone. Syncios iOS Eraser is one of the most powerful tools to instantly delete all iPhone contents, including music, junk files permanently to free up more space on your iOS device. This professional software provides you three erasing modes to clean iOS devices data.
Key Features of Syncios iOS Eraser Free:
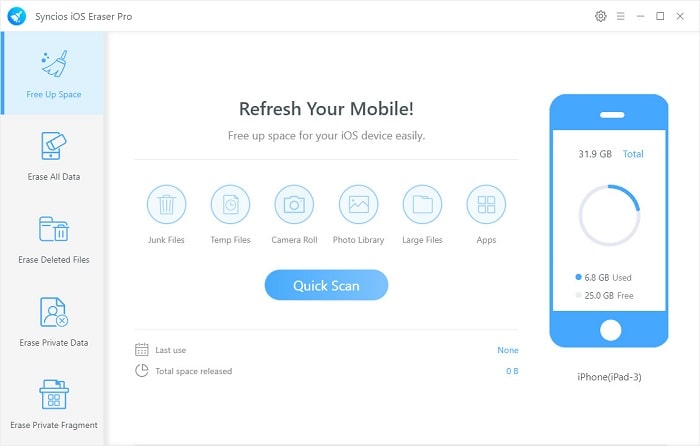
Step 1 : Free Download Syncios iOS Eraser and install it on your PC. Launch the program and connect your iOS device with PC.
Step 2 : Tab "Free Up Space" and click "Quick Scan" on the right panel.
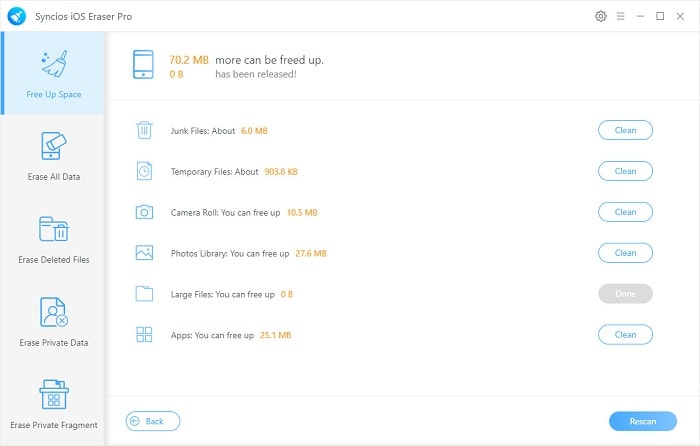
Step 3 : Click the button "Clean" beside the "Large Files". It switches to the details page and list all the large files including music on your iPhone.
Step 4 : Choose the music files you want to delete and tab "Clean" to make sure of the deletion.
Your will find all the selected music have been removed from your iPhone and there is a large free space for phone. Deleting large files including music is a great way to give your iPhone (or iPad) a speed boost and get it running faster than ever.
Please note: Both above ways are removing music from iPhone. Please re-sync your music library with iTunes and resetting music on your iPhone. So the deleted music cannot go back to your iPhone again.
Related Articles