How to Use iPhone Data Recovery for Mac
Download PDF User Guide

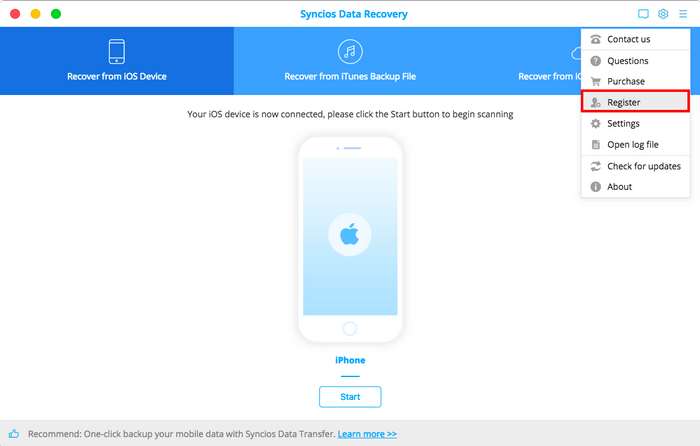
Step 1: Click menu button on the right corner of the program interface.
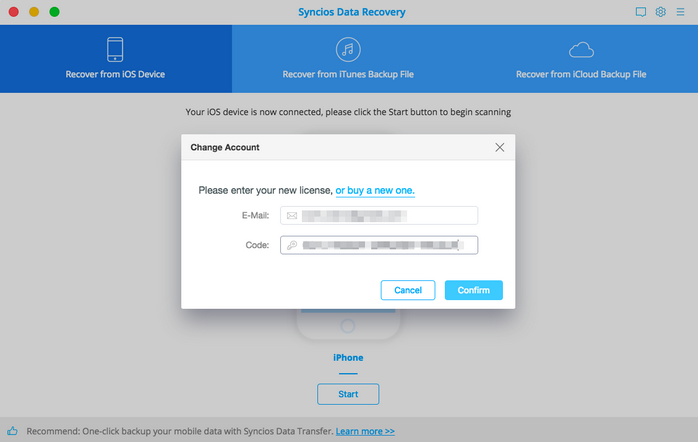
Step 2: Choose Register in the drop-down list, you will get the register window below.
Step 3: Copy and paste the Email and Code into the registration popup dialog.
Note: The registration contents are case sensitive. Please do not add blank at the beginning or the end of the word.
Now, let's learn how to use Syncios Data Recovery.
This mode allows you to scan your iOS devices to recover lost data or deleted data, including contacts, text messages, iMessages, photos, notes, calendars, reminders, bookmarks and more from iPhone 17, iPhone 16, iPhone 15, iPhone 11/XS (Max)/8(Plus)/7(Plus)/6(Plus)/5S/5C/5/4S/4/3GS, iPad Air, iPad mini 2 (Retina), iPad mini, iPad with Retina display, The new iPad, iPad 2/1, and iPod touch 5/4.
Note: Please don't use your device after you lost data. Because any operation on your device will generate new data, which can overwrite the lost data and make it unrecoverable.
Step 1: Connect iOS Device to Computer
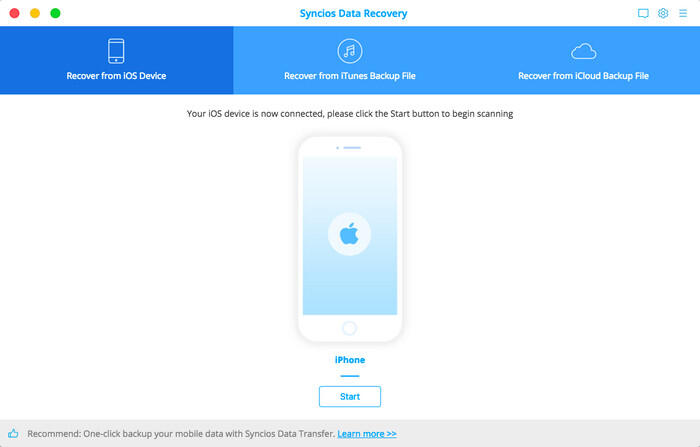
Run Syncios Data Recovery program on your computer, insert the USB cable for the iPhone into the iPhone's docking port, and insert the alternate end into your computer's USB port, once connected, you will get the interface like below:
Step 2: Scan your iPhone, iPad, iPod Touch
Once your device is recognized and connected successfully, click "Start", and you are allowed to select desired data before scanning. Then redirect you to scanning interface. The scan process will take you several seconds to minutes for scanning depending on the file size stored on your device.
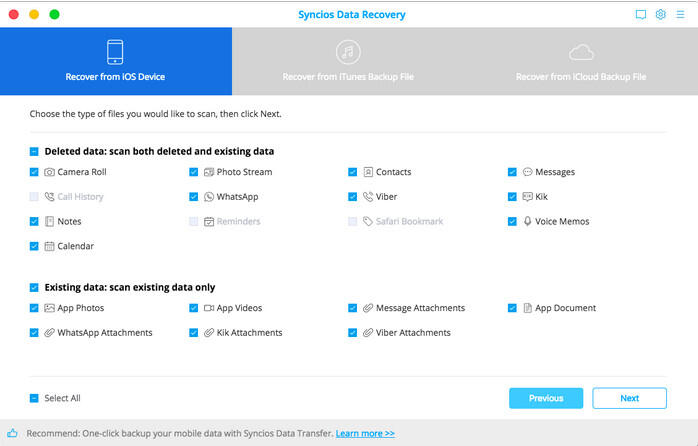
During the scan, make sure that your device is connected well and don't disconnect it for any reason, or you need to start it over.
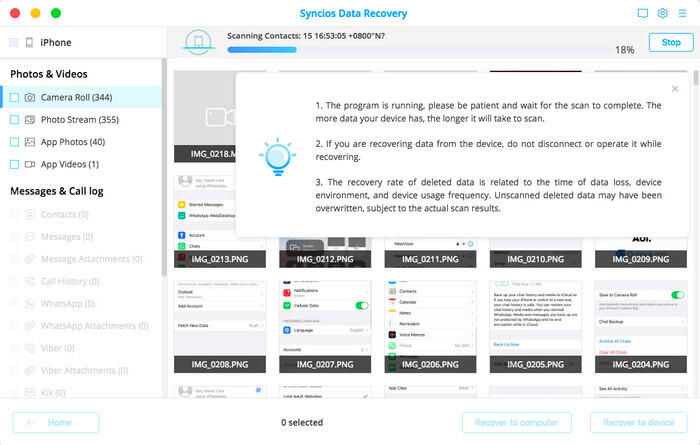
Step 3: Preview and get back lost data from your iPhone, iPad or iPod Touch
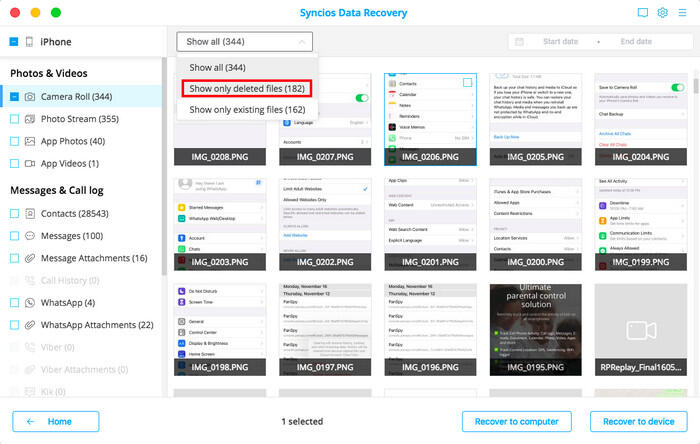
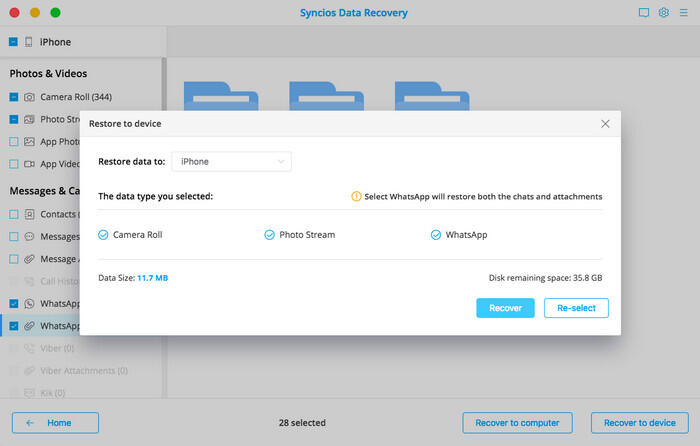
After scanning, found data on your iOS device will be shown according to file types. You can preview them one by one so as to check how much of your lost data can be recovered. Then you can tick the files you need and click the 'Recover to Computer' or 'Recover to device' button to save them to your computer.
Note: You are allowed to switch "Show Only deleted files" to ON, so you could preview the lost files only.
This solution works well for all iPhone, iPad and iPod touch. It lets you extract and access to the iTunes backup file of all your iOS device on your computer. Then you can get whatever you want from it. There’s no need for you to connect your iOS device with the computer when using this solution.
Step 1: Select your iTunes backup and extract it
Please select the Recover from iTunes backup option on the top after running Syncios Data Recovery. Then you can see the program displayed all the iTunes backup files for your iPhone, iPad and iPod touch in a list as follows. Choose the one you would like to access and click Start button when it comes up to enter into the next step.
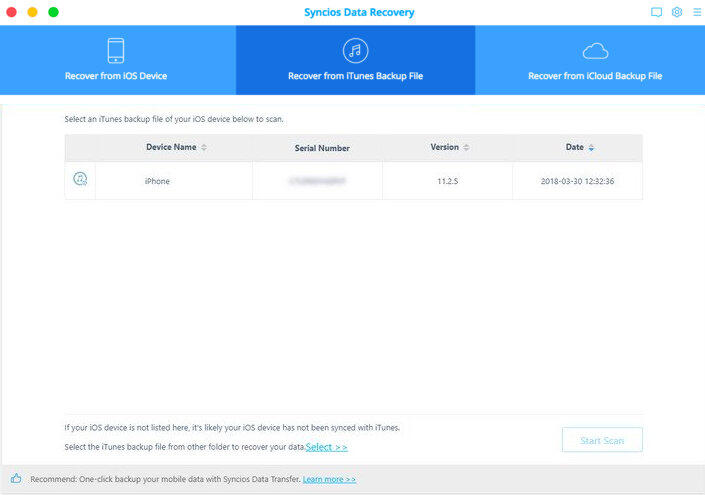
Step 2: Preview and restore data from iTunes backup files
Once the program stops scanning, you can begin previewing all extracted files in the window. Then please select your lost files and click Recover to computer or Recover to iPhone to recover found data to computer or device.
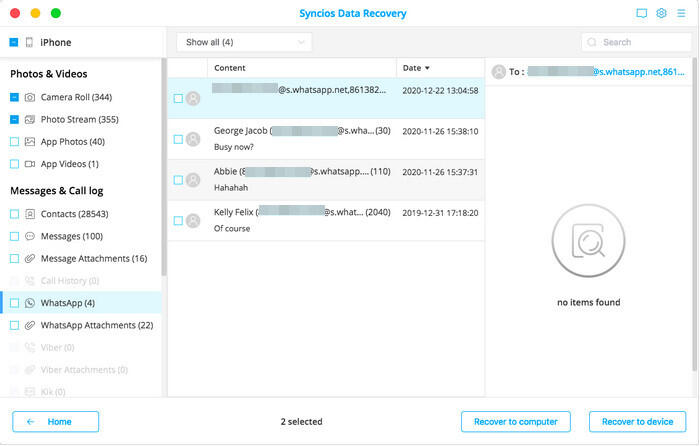
Just like iTunes backup files, Apple doesn't allow anyone to access iCloud backup files, either, unless you restore it entirely to your iOS device. But Syncios Data Recovery helps you access to the your iCloud Photos Contacts, Notes, Reminder, and Calendar, so that you can get what you want from it one by one.
Step 1: Sign in iCloud
Please select Recover from iCloud backup mode after running Syncios Data Recovery. Then enter your iCloud account to sign in. When you do this, make sure that your internet connection keeps working fine.
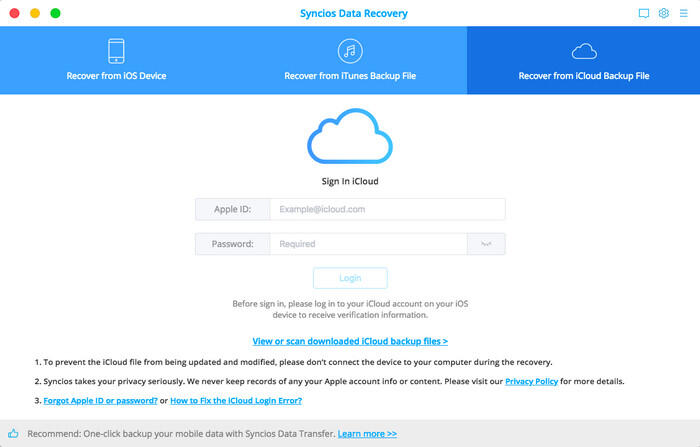
Step 2:Choose Your desired iCloud Data to Download
Once you're in, you are ble to choose which files to download for a preview including photos, contacts, notes, reminders and calendars. Check the types of data you would like to download and click Next' 'button to begin.
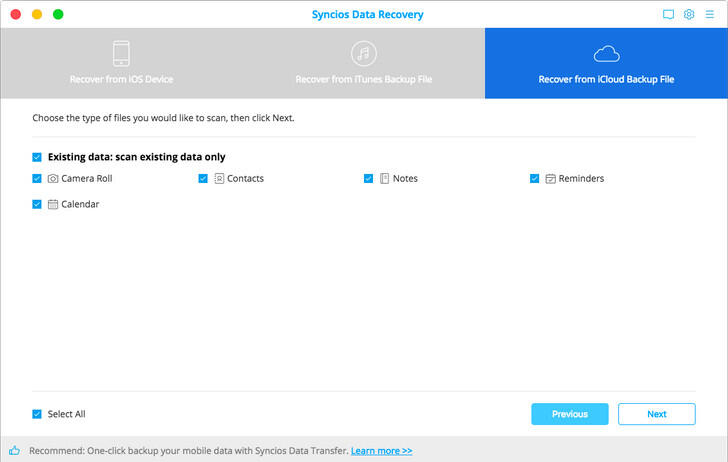
Step 3:Extract and Scan the iCloud Data
On the way to access and download iCloud data, it may take time to complete the process. Please make sure your Internet is working fine during the whole download process, thus the program can extract the icloud data quicker.
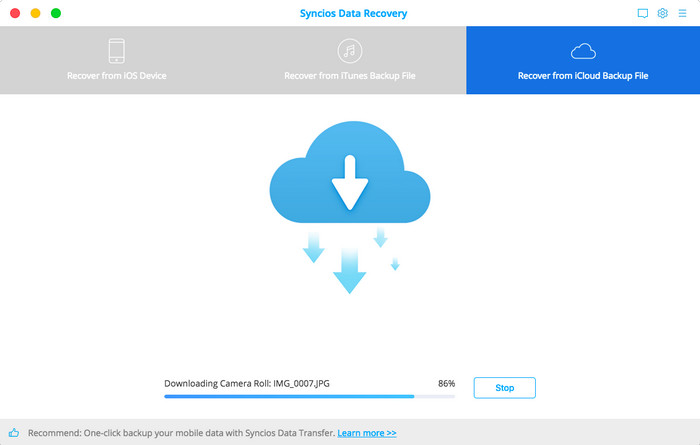
Step 4:Preview and Recover the iCloud Data to iPhone or to Computer
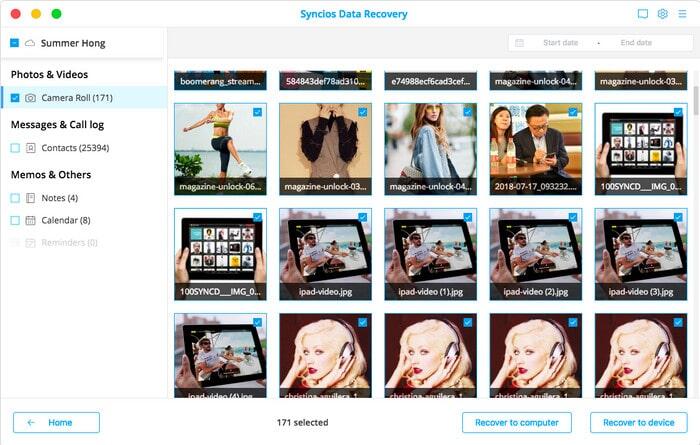
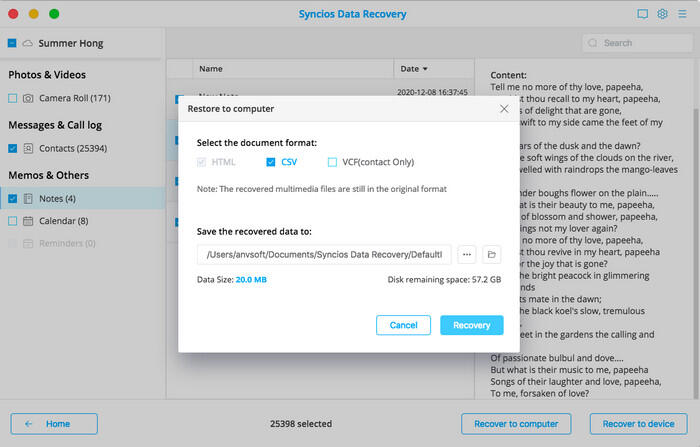
After the downloading and scanning process, you can preview the iCloud contents in details. Simply choose the file type you want to preview and save to your computer by clicking 'Recover to computer' at the lower right corner of the window. You will be prompted to recover to computer, then set the target location you would liket to store the files. Meanwhile, you are able to export the iCloud file to CSV or HTML format, which is comfortably read on computer.
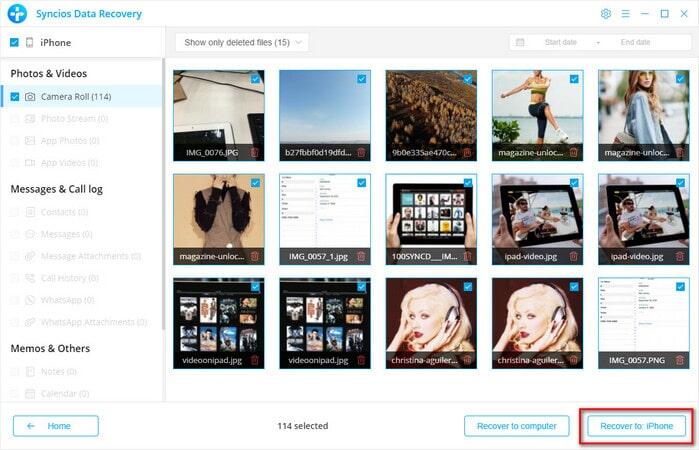
If you are meant to restore iCloud data to your iPhone, making sure you connected your iPhone to Syncios before. And then tap 'Recover to device' after you select your needed data.
Tips what's next? Download Syncios Data Recovery now!
Syncios Data Transfer
Selectively Backup, Restore and Transfer iOS and Android Data. Learn more >>
Syncios Location Changer
One-click to spoof iPhone location and simulate GPS movement. Learn more >>
Syncios Passcode Unlocker
Remove Touch ID, Face ID, Apple ID, Screen Time lock from iOS. Learn more >>
FAQ
- How can I recover my iPhone data?
- What kind of data can I recover using Syncios Data Recovery?
- Can you guarantee to retrieve my deleted data?
- Can I recover data from iCloud backup?
- Difference between Syncios Data Recovery and iTunes?
- Can I recover iPhone data after factory reset?
- The pictures are all thumbnails, how to make them in full size?
- How to recover photos after deleted from recently deleted?
- Why it shows "Empty filter, please reset conditions"?
- Why does it show "unknown contact" when I recover messages?
- Will the lost data be recovered to computer or to iOS device?
- Failed to Open Syncios on Mac?
- How to fix the iCloud Login Error?
- What to do if I got the prompt "No enough disk space, please free up".
- What to do if I get "Analyze is unsuccessful" error.
- Syncios Data Recovery from an unidentified developer?
- How do I recover data from a dead iPhone?
- Why Syncios can not read my iTunes backup on Mac 10.14?
- How do I run the recovery program on my iPhone?
- Why Syncios takes so long to scan my phone?
- What to do if the program freeze or crash?
- Can I recover my data from black or unresponsive device?
- Can I recover data from a password locked iOS device?
Guide & Tips
- How to Recover Lost Data on iPhone
- How to Recover Lost Data on iPad
- How to Recover Lost Data on iPod
- Recover Deleted WhatsApp Messages
- Recover Deleted Photos on iPhone

- Recover Lost Photo from iCloud
- Recover Lost Notes from iCloud
- Recover Deleted Kik Messages
- Recover Deleted Viber Messages
- Recover iTunes/iCloud backup to Android
- Recover Lost iPhone Contacts
- Recover Lost iPhone Messages
- Recover Lost iPhone Voice Memo
- Recover Lost iPhone Call Logs
- Recover Lost iPhone Videos
- Recover Lost iPhone Bookmarks
- How to recover deleted iPhone contacts
- How To Backup And Restore WhatsApp Messages On iPhone (iPhone 11 series included)


