![]() One management tool for all smartphones to transfer files between PC & iOS/Android devices.
One management tool for all smartphones to transfer files between PC & iOS/Android devices.
![]() >How-to > ios backup and restore >How to Backup and Restore iPhone Data on iOS 13
>How-to > ios backup and restore >How to Backup and Restore iPhone Data on iOS 13
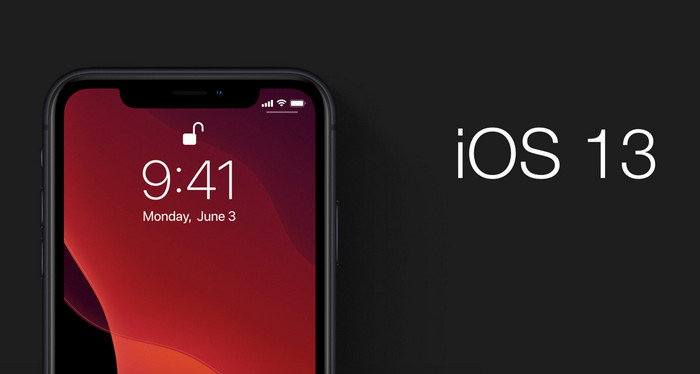
Routinely Apple has launched the public beta versions of iOS 13 when it would take a level of patience in dealing with the bugs that just don’t know. The good news is that you can go back to the current official version of iOS 12, and the process isn't overly complicated or tough. The bad news depends on whether or not you created a backup of your iPhone or iPad before you installed the beta. Backup space in iPhone is paid which refuses some users to do the backup. However, Syncios Manager and Syncios Data Transfer take a more interactive approach to back up and restore your files after upgrading your devices to iOS 13.
This tutorial is suitable for all the iPhones, iPads and iPods on iOS13 version ranging from iPhone XS, iPhone X, iPhone XR, iPhone 8/7/6/6s/5s/5/4.
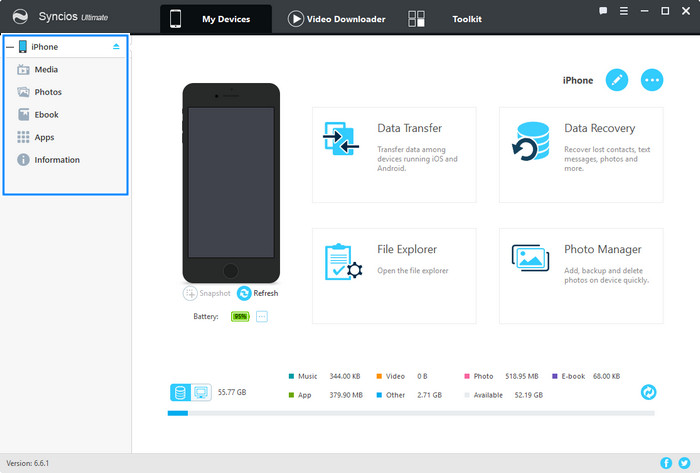
Step 1 Download Syncios Manager on your computer and register on the upper right menu ![]() .
.
Download
Win Version
Download
Mac Version
Step 2 Connect your iPhone into the program via appropriate cable, make sure you check out our complete guide to iOS 13 devices connection to Syncios Manager.When you have come to this step, you are free to manage and selectively delete the duplicate files to further release the storage on your iPhone.
Step 3 Go to Toolkit >>> 1-Click Backup
If you have decided to have a full backup instead of the selective backup of the files on iPhone, you now can take good advantage of the features built in Syncios Manager. 1-Click Backup is one of the various options to back up the iPhone data overall. Above the menu bar, users can click on Toolkit to functional tools recommended to use. And the here is to choose 1-Click Backup.
Step 4 Customize the path of the backup and select the data you need to backup. The rest of the process is handled by Syncios Manager, just follow the prompts. You can select all the major files to backup such as Media, Photos, Ebook, Information. Or you can specially back up the item that you weigh a lot like Contacts, Note, Bookmark, Call history, Messages, WhatsApp, Safari history and Voicemail ,etc.
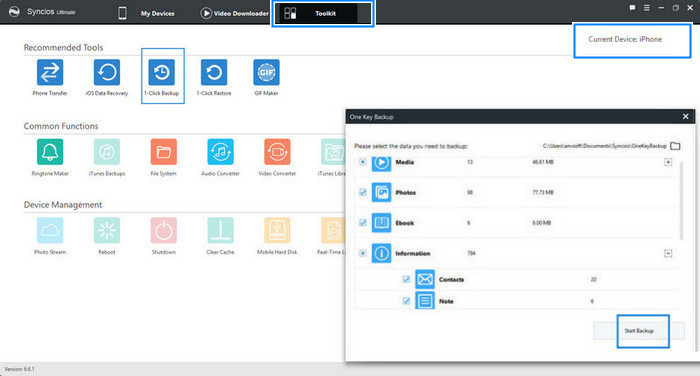
Step 5 Click on Start Backup and don't disconnect your iPhone from PC until it tells you it's safe to do so.
If you are going to recover the data to your iOS 13 devices, and these are the steps:
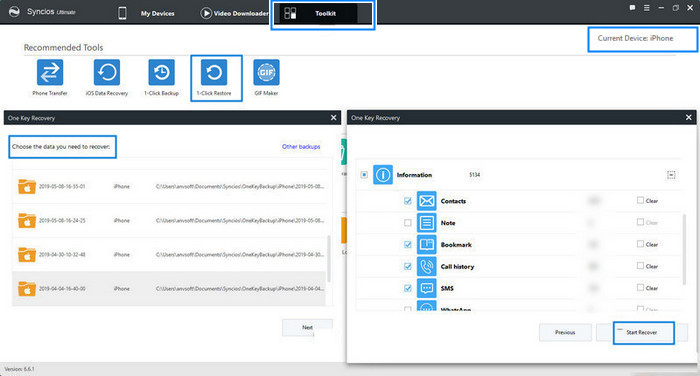
Step 1 Go to Toolkit >>>1-Click Restore
Step 2 Choose the backup folder that you are going to restore to your iOS devices.
Step 3 Next to select the specific items to restore to your devices. If you have suffered a total loss of data in your iPhone/iPad/iPods, you can select all the options. If you only want retrieve your important files like Contacts, photos, call history, etc. You can directly kick on the item and let go of others.
Step 4 Start Restore to recover the data you want.
When you finished the backup and restore of the iPhone data on iOS 13 with the assistance of Syncios Manager. You may wonder what if the data in iTunes and iCloud backup in the previous iOS versions. Never mind, get the Syncios Data Transfer installed the latest version, you'll have a chance to restore it from a backup, be it in iTunes or via iCloud.
Step 1 Free Download and install the latest version of Syncios Data Transfer.
Download
Win Version
Download
Mac Version
Step 2 Restore mode and connect iPhone to the program via USB.
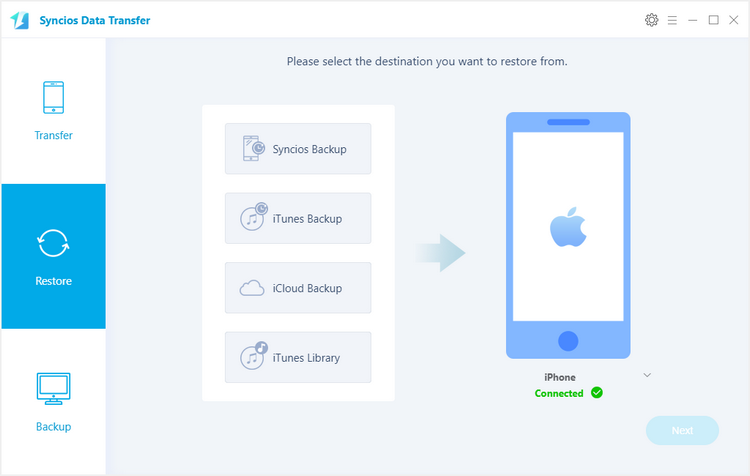
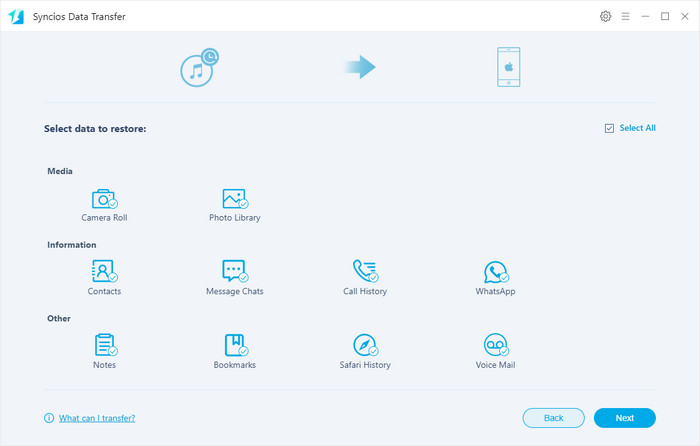
Step 4 Next to select the data to restore. ITems supported to restore are Camera Roll, Photo Library, Contacts, Message Chats, Call History, Contacts, Message Chats, Call History, Notes, Bookmarks, Safari History, Voicemail.
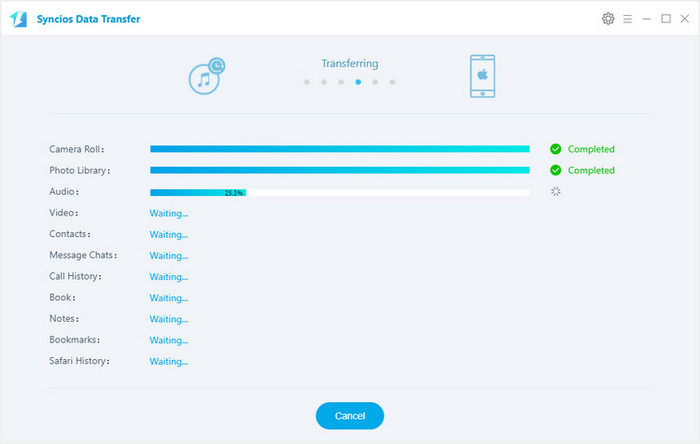
Step 5 Next to transfer the targeted items until it completed.
To avoid any data or quality loss when you are using your iOS 13 devices, people are supposed to make efforts on the data backup. Syncios Manager is a superior choice for iOS users to have a deep experience of their devices. Syncios Data Transfer helps iOS devices to easily migrate data among iOS devices.