![]() One management tool for all smartphones to transfer files between PC & iOS/Android devices.
One management tool for all smartphones to transfer files between PC & iOS/Android devices.

Why should we learn some methods of exporting and importing photos? Firstly, we discuss why we need to know how to import photos to a phone. By the way, as a specific post for Samsung Galaxy S25, the phone we mean Note 9 here. But in this post, these ways can also be applied to import photos to other iOS or Android devices. Right, we should talk about why we need to prepare for importing photos to Samsung Galaxy S25. Many reasons we can offer. For instance, when switching to the neew Note 9, we want to obtain photos from our old phones. And we may have saved some photos and pictures on computer before, and now, we want to import them to our new Note 9.
Except for importing photos, we also need to export photos. Because we would like to take a lot of beautiful pictures to record our beautiful life with Note 9 and store photos on the internal storage or micro SD card. However, the storage space always has its limit if you want to store more songs and videos. Once the storage limit has been reached, you will fail to store new data unless you remove some files on your Samsung Galaxy S25. Under these circumstances, if you have saved some precious photos and don't want to lose them, it is suggested to copy Samsung Galaxy S25 images to PC. Meanwhile, this method can also help you avoid suffering form losing those pictures all of a sudden.
To accomplish your needs of exporting and importing photos on Samsung Galaxy S25, this article offers some effective ways to transfer Samsung Galaxy S25 photos to computer or import other photos to Samsung Galaxy S25 as easy as possible.
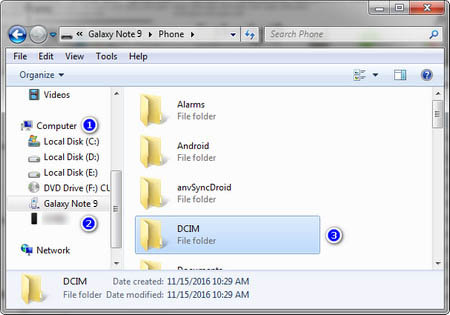
Actually, for Android devices, you can always transfer photos and pictures to computer with just an USB cable, it couldn't be much easier. But you may be not a fan of navigating photos from one folder to another. Anyway, you can follow the steps below then decide what to do:
A hadily tool will be introduced to manage your Samsung Galaxy S25 photos. You can easily to preview, export, import, edit, delete Note 9 photos with the help of Syncios Manager for free. Find the details below:
Step 1 Download and install Syncios Manager on your computer from below, launch it. Then enable USB debugging mode on your Samsung Galaxy S25. After that, Syncios would detect your device. You can connect your Samsung Galaxy S25 to computer with USB cable or via WiFi properly.
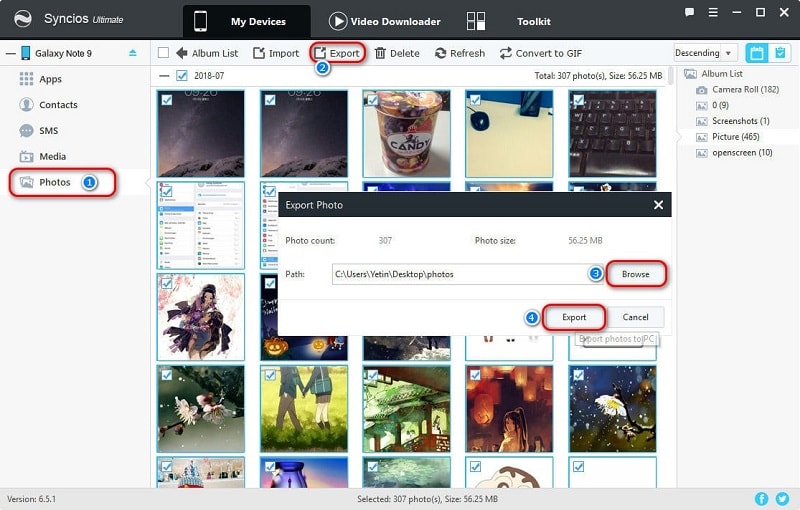
Step 2 Five categories will be listed on the left of the panel, simply click on Photos option, then Syncios would display all your photos and pictures clearly.
Step 3 Simply select your desired photos or photo album with a clear preview. Then click on Export button and choose a proper location to save your photos or photo album to computer.
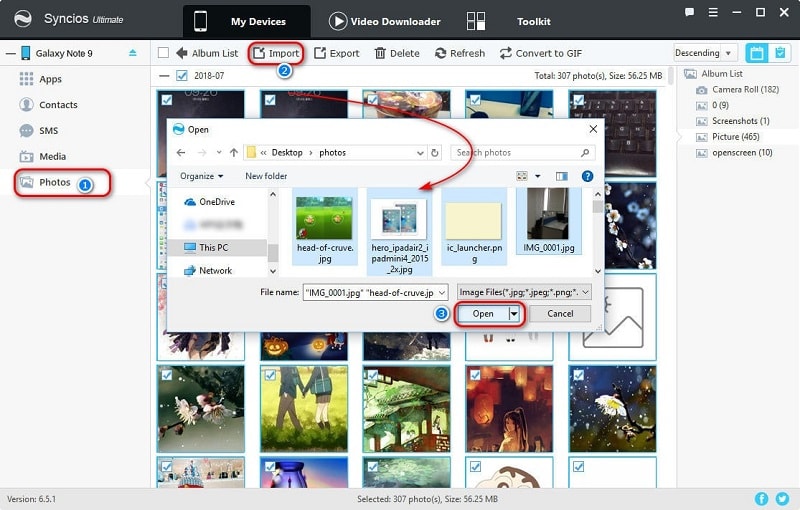
Step 4 To import photos from computer, find button Import then choose photos or pictures from computer to import to Samsung Galaxy S25.
It's convenient to export and import photos using method 2. But if you are going to transfer a large number of photos and now you need to backup them to PC simply, you may not want to do this job manually. Because exporting photos or photo albums one by one will cost you much time. How about one-click transferring all photos to PC? Syncios Data Transfer only takes one click to move all DCIM photos, pictures from your Note 9 to computer without any quality loss, fast and powerful. Besides, you are able to make a quick photo backup of another phone, then check those photos to keep some photos you need and restore them to your Note 9 simply. If you still have no idea to what I am talking, you can just follow the instructions below.
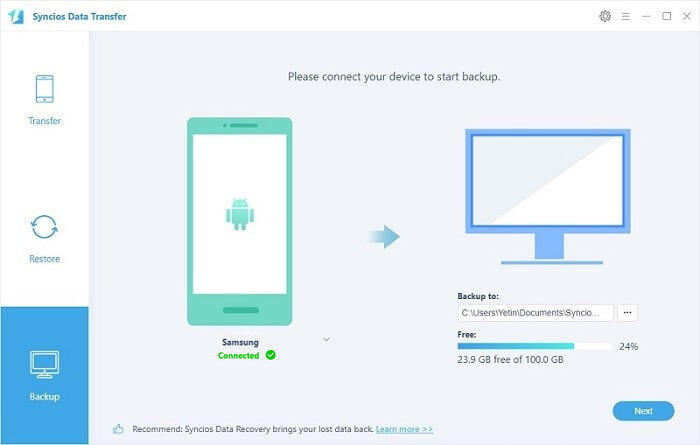
Step 1 Download and install Syncios Data Transfer on PC, launch it. This software offers four modes for tarsnferring data. You are allowed to transfer data from Phone to Phone, backup phone to PC then restore data from PC, even more you can restore phone from iTunes backup and restore phone from iCloud backup easily. Click on Backup on the homepage. Then enable USB debugging mode on your Samsung Galaxy S25. And Connect Samsung Galaxy S25 to computer with USB cable or via WiFi. And click on Next.
Download
Win Version
Download
Mac Version
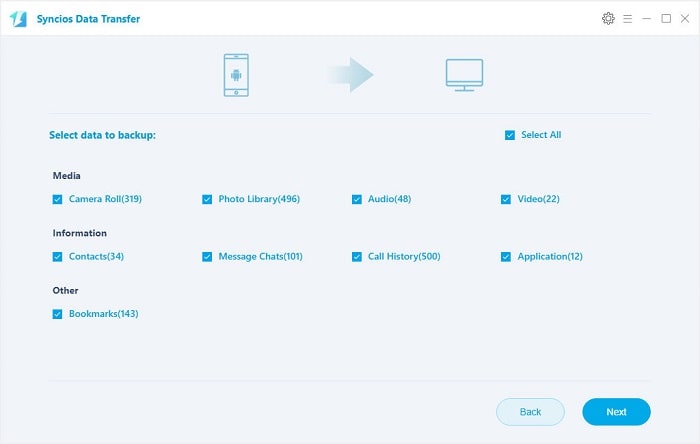
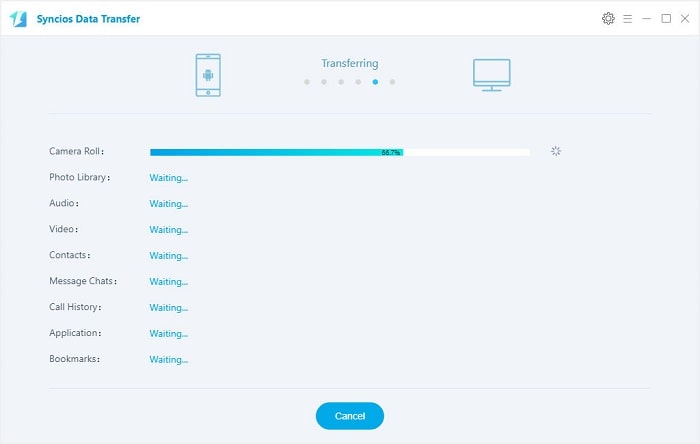
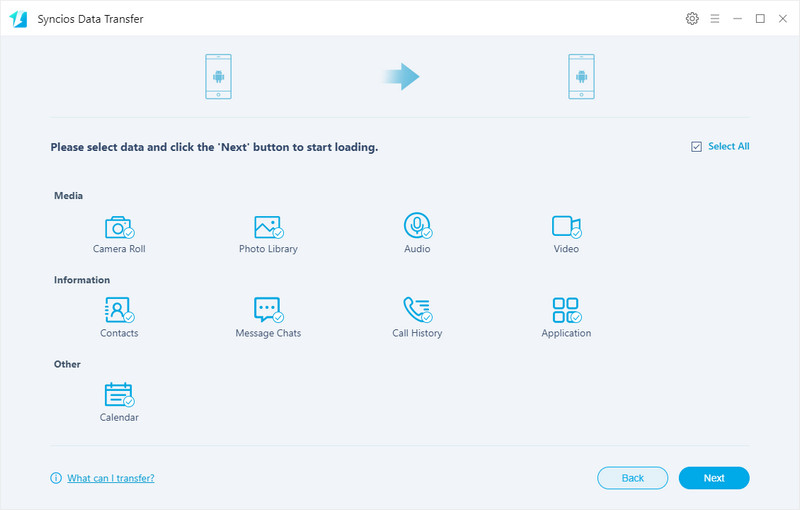
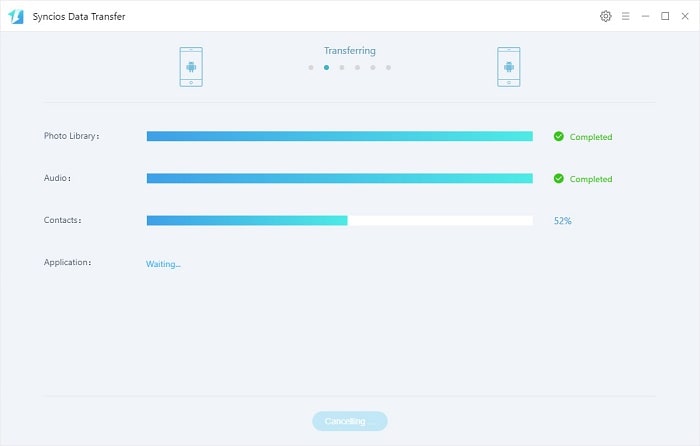
Step 2 After that, Syncios would provide you some options. You are able to select contents you need to backup. To transfer photos to computer, we need to tick off Camera Roll and Photo Library options, then wait for data loading. And next start the transfer process. After a while, all photos would be transferred to your computer.
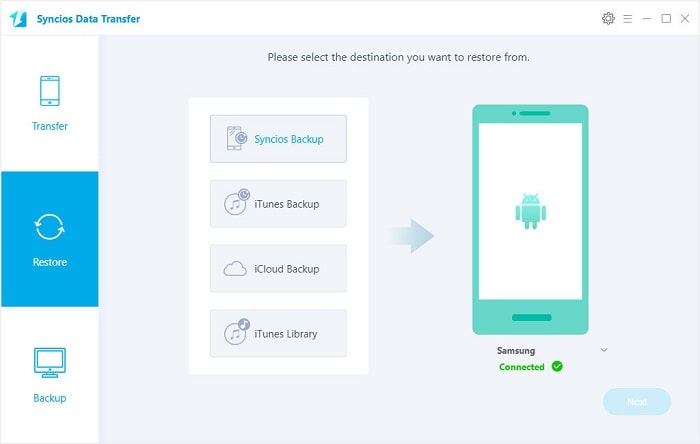
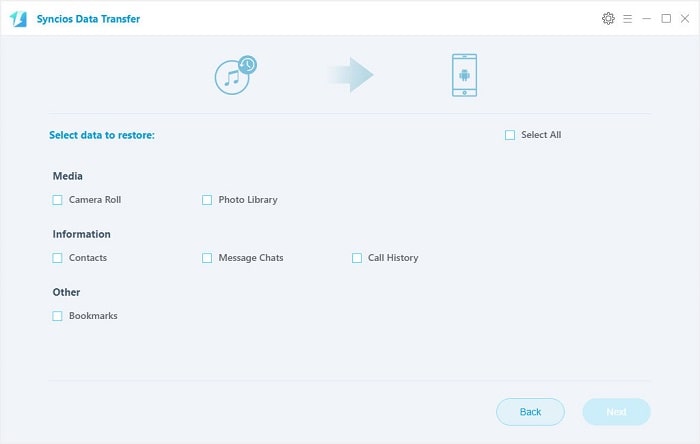
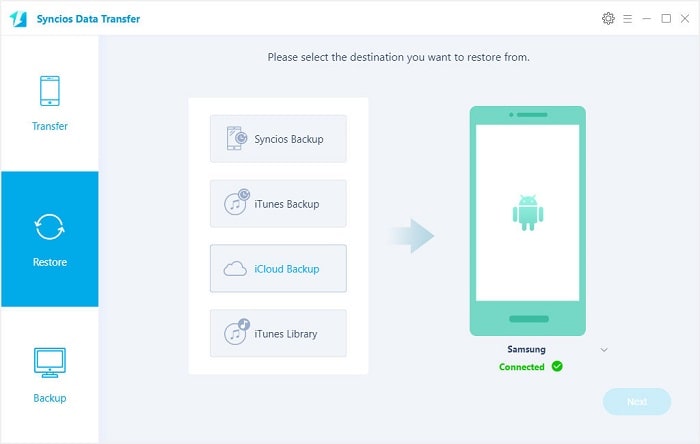
Step 3 Go find Restore when you need to get those photos and pictures back. Syncios will detect the previous backups on your computer and list them clearly. Choose one backup and click on Next. Tick off Camera Roll and Photo Library options from the content box. And next start the transfer process to restore photos to Note 9.

Step 4 If you need to backup another phone's photos then restore them to Note 9. Just connect another phone at first, then click on Backup to save another phone's photos to computer. Then also go find Restore and connect Samsung Galaxy S25 to PC. Click on Syncios Backup. Syncios will detect the previous backups on your computer and list them on the left panel. Choose one backup and tick off Camera Roll and Photo Library options from the content box. And next start the transfer process to restore photos to Note 9.
If you have stored a large number of photos on your old phone and now you need to move them to your new Note 9, you can choose to backup your old phone's photos to PC then restore them to your new Note 9 using method 3. Or you can simply use another mode of Syncios Data Transfer, which only takes you one click to move all DCIM photos, pictures, videos and other contents from your old phone to Note 9 without any quality loss, fast and powerful. Follow us to find more details.
Step 1 Download and install Syncios Data Transfer according to your operating system, windows version or Mac version. Then run it on your computer. Choose Transfer from the start-up interface.
Download
Win Version
Download
Mac Version
Step 2 Then turn on the USB debugging mode on your Samsung Galaxy S25. And if you old phone is Android phone, you also need to turn on its USB debugging mode. After that, connect both of your old phone and Note 9 to computer. Keep your phones unlocked and check the phone screen when connecting in case of any pop-up message.
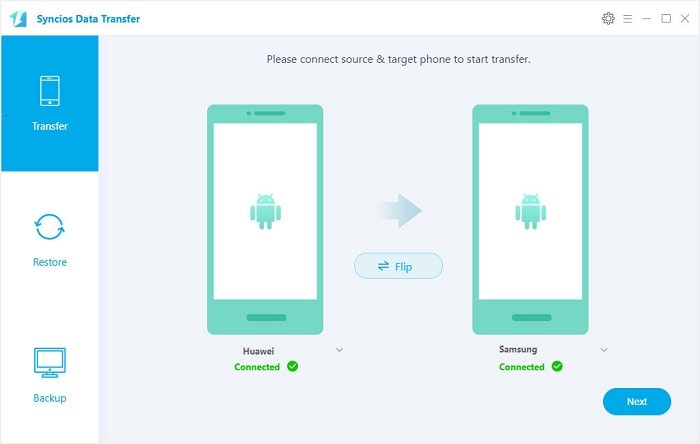
Step 3 Make sure your old phone is on the left as the source device and your Samsung Galaxy S25 is on the right as the target device. If not, click on Flip button to exchange their positions. Then click on Next to move on.
Step 3 Select Camera Roll and Photo Library. The data of source device (iPhone) will be loaded. And next start the transfer process to transfer photos to your Note 9 directly. Now wait till the transferring process finishes.
If you were a iOS user before, and now you could not find your iOS device or you've deleted old data. You may have some backups made by iTunes. If not, you can simply follow 4 methods above to manage photos. Here we are going to share a way of retrieving iTunes backups to Samsung Galaxy S25 without iTunes.
Step 1 Run Syncios Data Transfer on your computer. Navigate to Restore > iTunes Backup on the primary interface.
Download
Win Version
Download
Mac Version

Step 2 The USB debugging mode on your Samsung Galaxy S25 should be enabled as usual. Then connect your Samsung Galaxy S25 to PC. Your iTunes backups saved on computer will be detected by Syncios automatically.
Step 2 Choose one backup and click on next. Select Camera Roll and Photo Library from the content box. Finally, you can start tarnsferring photos from iTunes backup to Samsung Galaxy S25.

Except a backup of iTunes, you may also have some backups made by iCloud. Making a backup of iPhone using iCloud from time to time should be familiar for every iOS user. If you’ve done iCloud Backup before, you can retrieve iPhone data from iCloud Backup to Note 9 directly as long as you know your Apple account. If not, go to the first four methods which are available for you to export and import Note 9 photos. Now, here we go.
Step 1 Install and open Syncios Data Transfer. This time, navigate to Restore > iCloud Backup. Also, the USB debugging mode on your Samsung Galaxy S25 should be enabled. After that, you can connect your Samsung Galaxy S25 to PC properly.
Download
Win Version
Download
Mac Version
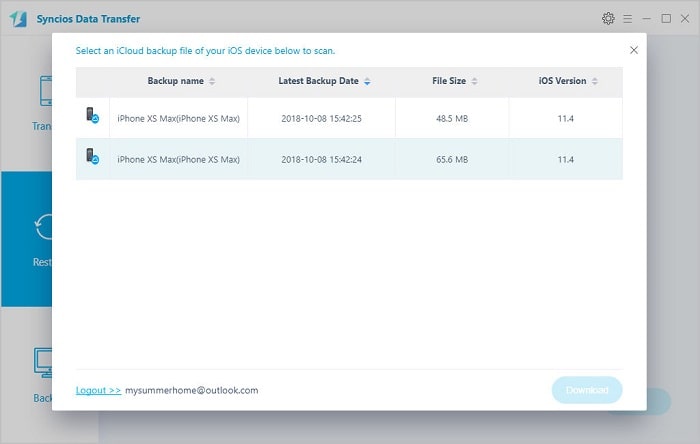
Step 2 You may need to download iCloud backups if it's your first time to restore iCloud backup using Syncios. You'll see a pop-up window which requires you to log in with your Apple account.
Step 3 After logging in with the right Apple ID, you'll see a list of your iCloud backups. Choose one backup to download (If there is an error when sign in iCloud, please follow here to fix it).
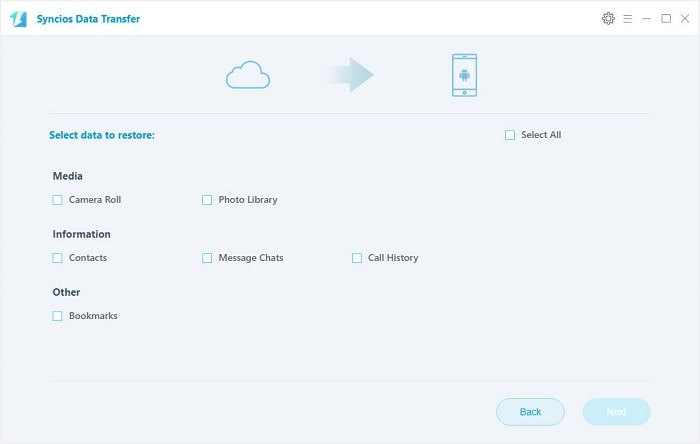
Step 4 Choose one backup you'd like and click on Next. Select Camera Roll and Photo Library from the content box. Finally, you can start tarnsferring photos from iCloud to your Samsung Galaxy S25 simply.
The End: In fact, you can transfer photos from old phone to new Samsung Galaxy S25, retrieve photos from iTunes or iCloud backup with one tool - Syncios Data Transfer. If you prefer a perfect data management on your Samsung Galaxy S25, you can choose Syncios Manager free tool. Or why not get a Syncios Manager Ultimate. Syncios Ultimate includes Data Transfer tool, you can find it in Toolkit of Syncios Ultimate. That's means, you could own both of Syncios Data Transfer and Syncios Manager by getting Syncios Ultimate. Of course, have a try, then choose a way most suited for you.