

 >
How-tos >
iPhone Tutorial >
>
How-tos >
iPhone Tutorial >
How to Transfer Photos from iPhone 16/16 Plus to Computer?
If you switched your old phone to the latest Apple product iPhone 16/16 Plus, whose camera have been reengineered, added optical image stabilization to make it even better for shooting photos and videos. It said it could be up to 3x longer exposure compared to iPhone 16s. And, iPhone 16 Plus doesn't have just one entirely new camera system — it has two, dual 12 MP rear camera and 7 MP front camera.
With the best iPhone camera ever, you may take a lot of pictures as well as selfie, then, you want to keep collection of photos to your computer. So how to sync these massive photos to your computer? This article gives you tutorials on how to import your iPhone 16 photos to Windows PC, including Win 7, Win 8, and Win 10.
Part 1: Import iPhone 16 photos to Windows 7/Windows 8/Windows 10 PC
As we know, there are 3 main operating systems currently: win 7, win 8 and Win 10. And a little difference between these three platforms in transferring photos.
Windows 7
Step 1Connect iPhone 16/16 Plus to your computer with a USB cable.
Step 2When the AutoPlay window pops out, click Import pictures and videos using Windows.
Step 3Select the photos and click Import, and you are also able to type a tag name in the Tag these pictures (optional) box.
Note: If the AutoPlay window does not appear, click computer, then right click on your device, select Import pictures and videos.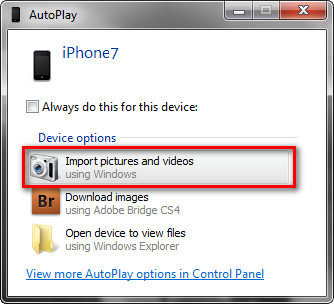
Windows 8
Step 1Connect your iPhone 16 to PC with a USB cable.
Step 2Open the Photos app, right-click within the app.
Step 3 Click Import and select the device you want to import from.
Step 4 The app automatically searches for all photos which hasn't imported before and selects them.
Note: You can also click each photo you want to import or Select all.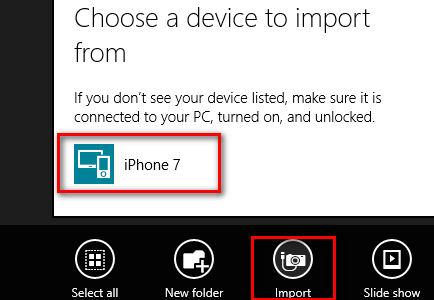
Windows 10
Step 1Connect your iPhone 16 to computer and tap "Trust" this computer on iPhone. Wait until it appears as "Portable Device" on computer.
Step 2Click the iPhone 16 icon to open and find the photo folder. Normally the folder locates under Internal Storage > DCIM.
Step 3Then you can copy and paste desired photos to computer.
Part 2: Sync iPhone 16's photos to computer via Syncios Manager
Syncios Mobile Manager is a helpful application, which makes it easy to help you sync all types of files to your computer from your iPhone 16. The best advantage of this approach is that with visual interface, you are able to preview, edit, manage photos on computer. Besides, you could choose and transfer certain picture from iPhone 16 to PC. Whatever systems your computer are running, Win 7, Win 8 or Win 10. Tips as follows:
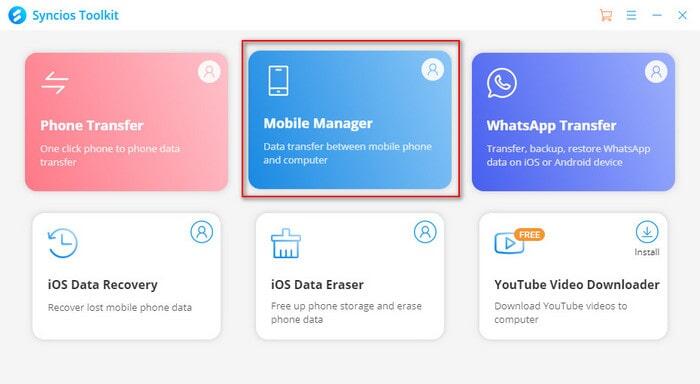
Step 1Download and install Syncios Toolkit on your computer and run it. And click into 'Mobile Manager' on Syncios Toolkit interface to intiate the Syncios Mobile Manager. Then connect your iPhone 16 to it through USB cable.
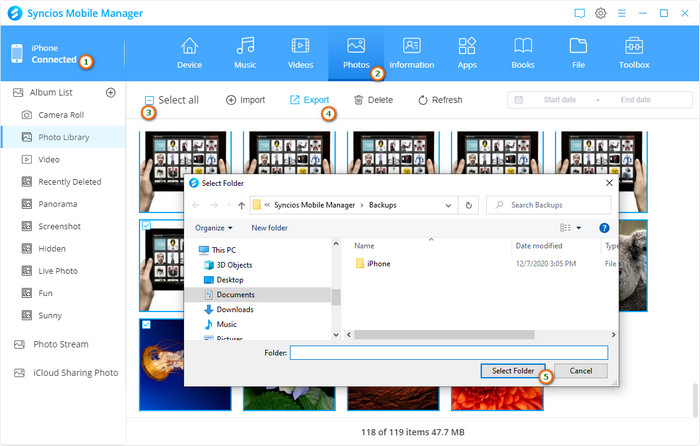
Step 2Click on "Photos" on the top menu and all photos as well as albums on iPhone 16 will be displayed on the current window. (See the figure as below)
Step 3And select your target photos to export to PC, simply tap on "Export" on the top menu and decide on your storage path. After a while, you can go and check in your local files on your computer.
Part 3. Transfer all your iPhone 16 photos to computer by one-click.
The final method could be the easiest and the best way to transfer your iPhone 16 photos to computer, since Syncios Data Transfer only takes you ONE CLICK to backup all DCIM photos from your iPhone 16 to computer whatever your operating systems are. Finish its job even better than you expected. What's more, it enables you to restore iTunes backup files to iPhone 16 as well, including contacts, text messages, music, videos, bookmarks, etc. Worth a try!
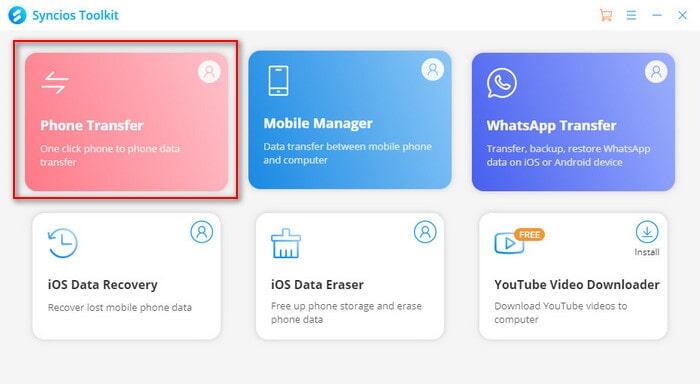
Step 1Click the download button provided below to get a Syncios Toolkit onto your computer. And then click into 'Phone Transfer' mode on the interface to initiate the Syncios Data Transfer. And then connect your iPhone 16 to it with USB cable.
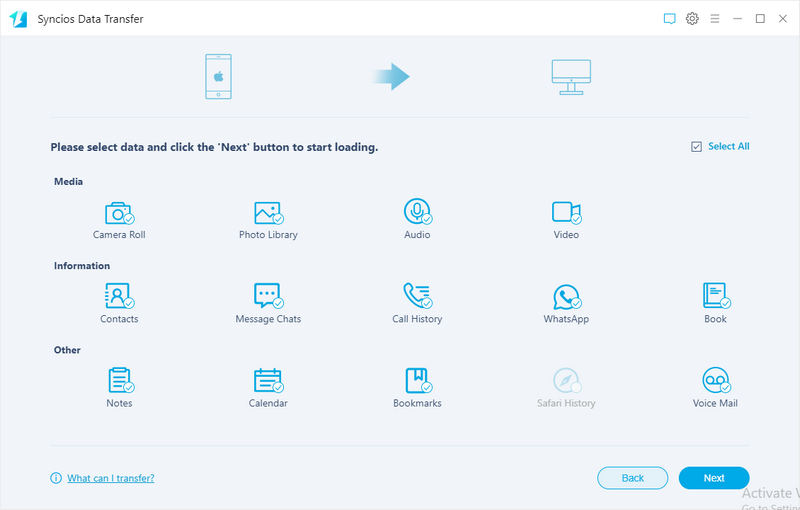
Step 2Click on "Backup" module from the homepage, as well as customize the backup path under "Backup to" tab. And click "Next" to select files.
Step 3Tick off "Camera Roll" and "Photo Library" on the checkbox, then click on "Next". Your photos will be transferred quickly to the computer.
Video Tutorial - How to Transfer Camera Roll from iPhone 16 to Computer
Conclusion
Now you can find one of the methods that fit you much to backup all photos from iPhone 16 to computer. Transferring photos by manual or under the help of Syncios Manager and Syncios Data Transfer, all these three approaches can restore photos back to iPhone if you need.


